How to choose the right Conwood G1 or G2 finish for a specific room? This guide dives deep into the nuances of selecting the perfect Conwood finish for your space, whether it’s a high-traffic kitchen or a serene bathroom. Understanding the distinct characteristics of G1 and G2 finishes, coupled with room-specific considerations, will empower you to make an informed decision that harmonizes aesthetics with practicality.
From the material composition and durability of each finish to the nuances of sheen and color, this comprehensive guide will walk you through the crucial factors to consider. We’ll explore the pros and cons of each finish, offering detailed comparisons to aid your selection process. Whether you’re a seasoned DIY enthusiast or a first-time homeowner, this resource will equip you with the knowledge needed to achieve the desired look and feel for your home.


Learn how to balance style with practicality, and find the ideal Conwood finish for any room in your house.
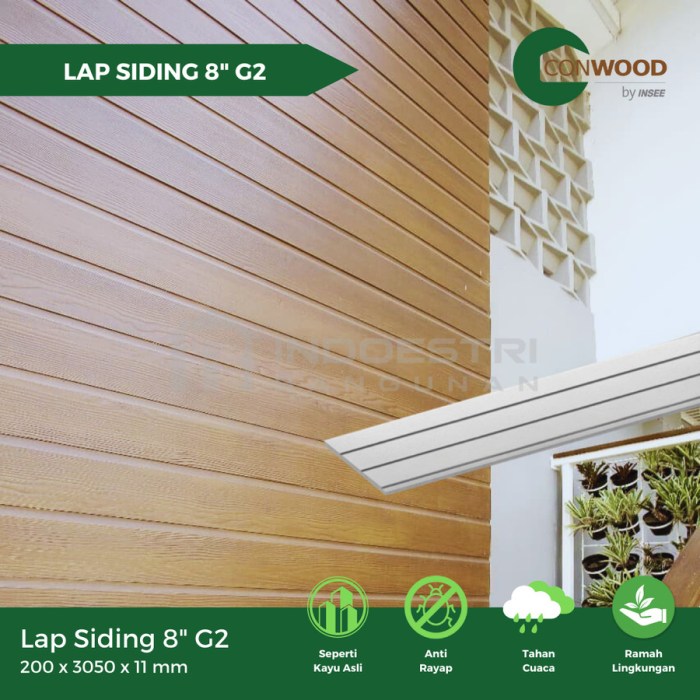
Understanding Conwood Finishes (G1 & G2)
Conwood offers a range of finishes, each designed for specific needs and aesthetics. Understanding the key differences between G1 and G2 finishes is crucial for selecting the ideal option for your project. This section delves into the material composition, durability, and maintenance requirements of each finish, providing a comprehensive comparison to aid your decision-making process.Conwood G1 and G2 finishes represent distinct levels of protection and aesthetic appeal.
G1 often leans towards a more budget-friendly option, while G2 emphasizes superior durability and a premium look. Factors like water resistance, scratch resistance, and ease of cleaning significantly differentiate the two, influencing the suitability of each finish for various applications.
Choosing the right Conwood G1 or G2 finish depends heavily on the room’s ambiance. For a sophisticated hotel room, like those offering great deals outside Manhattan, Hotel New York best deals outside Manhattan might influence your selection. Ultimately, consider factors like natural light and desired warmth when deciding between the two finishes for your specific space.
Material Composition and Durability
The material composition directly impacts the durability and longevity of a finish. G1 finishes typically feature a more basic, cost-effective formulation, potentially employing fewer layers or less robust materials. G2 finishes, on the other hand, utilize a more advanced, multi-layered composition with higher-quality materials, resulting in superior scratch resistance and water repellency. This superior construction typically translates into enhanced durability and a longer lifespan.
Appearance and Sheen
Differences in appearance between G1 and G2 finishes are noticeable. G1 finishes often exhibit a slightly less refined sheen compared to G2. Variations in color tones might also be more pronounced in G1. G2 finishes generally offer a more consistent and refined appearance with a smoother, richer sheen. This contributes to a more premium aesthetic, reflecting the added investment in material quality.
Maintenance Requirements
The maintenance requirements of each finish reflect their underlying composition. G1 finishes often require more frequent cleaning and maintenance to preserve their appearance. G2 finishes, owing to their superior construction, are typically more resilient to everyday wear and tear, demanding less frequent maintenance.
Cost, Longevity, and Aesthetic Appeal
G1 finishes, due to their simpler composition, generally have a lower price point. However, this lower initial cost may be offset by the need for more frequent maintenance and potential premature wear. G2 finishes, while more expensive upfront, are often more resilient, requiring less maintenance and offering a longer lifespan. The aesthetic appeal of G2 finishes is often superior, providing a more premium look.
Comparison Table: G1 vs. G2 Finishes
| Criteria | G1 Finish | G2 Finish |
|---|---|---|
| Water Resistance | Moderate | High |
| Scratch Resistance | Low | High |
| Ease of Cleaning | Moderate | High |
| Cost | Lower | Higher |
| Longevity | Medium | High |
| Aesthetic Appeal | Basic | Premium |
Room-Specific Considerations
Choosing the right Conwood finish hinges on understanding the unique demands of each room. Factors like traffic, moisture, and the overall design aesthetic significantly influence the suitability of either G1 or G2 finishes. Careful consideration of these elements ensures longevity and a pleasing visual impact within the space.
Traffic Levels and Moisture Exposure
Understanding the level of foot traffic and moisture exposure in a room is crucial for selecting the appropriate Conwood finish. High-traffic areas, like hallways or living rooms, necessitate a finish that can withstand frequent wear and tear. Conversely, rooms with lower traffic, like bedrooms, can accommodate finishes that might be more susceptible to minor scratches. Similarly, moisture exposure significantly impacts finish selection.
Kitchens and bathrooms, with their inherent moisture, require finishes that are resistant to water damage and warping. Conversely, rooms with minimal moisture exposure, like living rooms, can often support finishes with a lower resistance to moisture.
Design Aesthetic Considerations
The overall design aesthetic of the room plays a vital role in the choice of finish. A modern, minimalist living room might look best with the sleek, low-maintenance finish of G2, while a traditional dining room might be enhanced by the warmer, more textured appearance of G1. The desired ambiance of the space, including the color palette and style, should be factored into the decision-making process.
Harmonizing the finish with the room’s design enhances the overall visual appeal and creates a cohesive atmosphere.
Recommended Finishes for Different Room Types
| Room Type | Typical Traffic/Moisture | Recommended Conwood Finish | Justification |
|---|---|---|---|
| Kitchen | High traffic, moderate to high moisture | Conwood G2 | G2’s superior moisture resistance and durability are essential for high-traffic kitchens, particularly those prone to spills and splashes. Its smooth surface is easier to clean. |
| Bathroom | Moderate traffic, high moisture | Conwood G2 | G2’s water-resistant properties make it ideal for bathrooms, preventing warping and damage from moisture. |
| Living Room | Moderate traffic, low moisture | Either G1 or G2 | Depending on the specific design aesthetic, either finish can work well in a living room. G1 might enhance a traditional feel, while G2 could be preferable for a modern aesthetic. |
| Dining Room | Moderate traffic, low moisture | Conwood G1 | G1’s warm, textured look can enhance the elegance of a dining room, adding a touch of sophistication. |
| Bedroom | Low traffic, low moisture | Either G1 or G2 | Similar to living rooms, the choice depends on the design preference. G1’s warmth might be preferred for a cozy feel, while G2’s sleekness suits a contemporary aesthetic. |
| Hallway | High traffic, low moisture | Conwood G2 | G2’s durability and resistance to wear and tear make it ideal for high-traffic areas like hallways. |
Note that these are general guidelines, and specific circumstances may warrant adjustments to these recommendations. Consult with a Conwood professional or a knowledgeable interior designer for personalized advice.
Maintenance and Care
Proper maintenance is crucial for preserving the beauty and longevity of your Conwood G1 and G2 finishes. Consistent care ensures your flooring remains in excellent condition, resisting damage and maintaining its aesthetic appeal. Regular cleaning and preventative measures will significantly extend the life of your investment.Maintaining the pristine condition of Conwood flooring requires a thoughtful approach. Understanding the specific needs of each finish, G1 and G2, is key to preventing premature wear and tear.
Different cleaning methods and products are tailored to address potential issues, like scratches, stains, or water damage, for each finish type.
Cleaning Procedures
Maintaining Conwood’s beautiful finish involves a routine cleaning regimen. This process safeguards the integrity of the finish, preventing discoloration and maintaining its resilience to daily wear. Employing the correct cleaning products and techniques ensures the flooring remains in top condition for years to come.
- Pre-Cleaning Inspection: Before initiating the cleaning process, meticulously examine the flooring for any visible stains, debris, or imperfections. This proactive step helps identify potential issues early on and allows for targeted solutions.
- Gentle Cleaning Method: Use a soft-bristled brush or a microfiber mop to gently remove surface dirt and dust. Avoid harsh scrubbing, as it can potentially damage the finish.
- Specialized Cleaning Solutions: For general cleaning, use a mild, non-abrasive cleaner specifically formulated for hardwood floors. Dilute the cleaner according to the manufacturer’s instructions to prevent damage.
- Thorough Rinsing: After applying the cleaning solution, thoroughly rinse the floor to eliminate any residue. This prevents potential streaks or discoloration.
- Drying Process: Allow the floor to air dry completely, avoiding the use of harsh drying agents or excessive heat.
Addressing Common Issues
Addressing minor issues promptly can prevent them from escalating into larger problems. Prompt action is crucial to maintaining the aesthetic appeal and structural integrity of your Conwood floors.
- Scratches: Minor scratches can be addressed using specialized wood fillers or touch-up pens. For deeper scratches, professional repair services may be necessary.
- Stains: Act swiftly when encountering stains. Apply a stain remover appropriate for the type of stain, following the manufacturer’s instructions. Prompt action is crucial to prevent the stain from setting in.
- Water Damage: Water damage can lead to significant problems. If water spills occur, promptly absorb the excess water with a clean cloth or paper towels. Allow the affected area to dry completely. If the issue persists, contact a professional for assessment and repair.
Recommended Cleaning Products and Tools
The right cleaning products and tools are vital for maintaining the pristine condition of your Conwood floors. Selecting appropriate tools and products can prevent damage and maintain the integrity of the finish.
| Finish Type | Recommended Cleaning Products | Recommended Cleaning Tools |
|---|---|---|
| Conwood G1 | Mild, non-abrasive hardwood floor cleaner, specialized wood polish | Microfiber mop, soft-bristled brush, clean cloths, paper towels |
| Conwood G2 | Mild, non-abrasive hardwood floor cleaner, specialized wood polish | Microfiber mop, soft-bristled brush, clean cloths, paper towels, gentle scrubbing pad |
Visual Examples and Comparisons: How To Choose The Right Conwood G1 Or G2 Finish For A Specific Room
Choosing the right Conwood finish hinges on understanding its visual impact in different spaces. A proper selection requires considering the room’s existing aesthetic and the desired atmosphere. This section provides detailed examples of Conwood G1 and G2 finishes in various settings, enabling informed decisions.
Kitchen with Conwood G1 Finish
A kitchen featuring a Conwood G1 finish offers a modern and sleek aesthetic. The G1’s lighter, often warm-toned hues, create a bright and airy ambiance, ideal for kitchens seeking a contemporary feel. Cabinets, countertops, and backsplashes in G1 can enhance the overall space, reflecting light and making the kitchen feel larger. The natural wood grain pattern in G1 is typically more pronounced, adding a touch of rustic charm without compromising the modern appeal.
Countertops, crafted from solid wood with a G1 finish, offer a tactile and visually appealing surface, perfect for preparing meals.
Bathroom with Conwood G2 Finish
The bathroom, with its unique humidity and moisture levels, is well-suited for the Conwood G2 finish. The G2 finish, often darker and richer in tone, provides a more substantial and robust appearance. The inherent water resistance of this finish makes it suitable for a high-moisture environment. The deep tones and subtle wood grain of G2 contribute to a sense of sophisticated elegance and create a calming atmosphere in the bathroom.
This finish, with its durability and resistance to moisture, is well-suited for bathroom cabinets and vanity tops.
Living Room Comparison: G1 and G2 Finishes
A living room showcasing both finishes demonstrates the aesthetic variations achievable with Conwood. A G1 finish in the living room offers a warm and inviting atmosphere. The lighter tones reflect light and create a bright and open feel. In contrast, a G2 finish evokes a more sophisticated and contemporary vibe, ideal for a living room desiring a more dramatic look.
The richer tones in G2 can anchor the space, complementing darker furniture and accents. Consider the existing décor and the desired ambience when choosing between these two options.
Visual Comparison Table, How to choose the right Conwood G1 or G2 finish for a specific room
| Surface | Conwood G1 Finish | Conwood G2 Finish |
|---|---|---|
| Countertops | Light-toned, warm hues, pronounced wood grain, enhancing a modern kitchen aesthetic. | Darker tones, rich in color, subtle wood grain, adding a sophisticated touch to a bathroom. |
| Cabinets | Bright and airy feel, visually expanding the space, perfect for modern kitchens. | Sophisticated and robust, ideal for bathrooms and spaces seeking a contemporary look. |
| Backsplash | Adds visual interest, highlighting the natural beauty of the wood. | Creates a dramatic focal point, enhancing the overall design of the bathroom. |
Additional Factors
Choosing the right Conwood finish involves more than just aesthetics and room type. Understanding the finer details, like warranties and installation procedures, is crucial for long-term satisfaction. Proper surface preparation is equally vital for achieving a flawless and durable finish. These additional factors will help you make a well-informed decision.Careful consideration of these supplementary factors ensures a seamless and long-lasting outcome.
A well-executed installation, coupled with appropriate surface preparation, significantly impacts the longevity and aesthetic appeal of the finished product. This approach also protects your investment and minimizes potential future issues.
Warranty and Guarantees
Warranty and guarantee details from Conwood are essential components of the decision-making process. These documents Artikel the manufacturer’s commitment to the quality and longevity of their products. Reviewing the specifics of coverage, including the duration, scope of repairs or replacements, and any exclusions, is crucial before purchase. This proactive step protects your investment and clarifies your recourse in case of unforeseen issues.
Sources of Additional Information
Numerous resources provide valuable insights into Conwood finishes. Conwood’s official website serves as a primary source of information, featuring detailed product descriptions, FAQs, and installation guides. Consult industry publications or online forums dedicated to flooring and home improvement for diverse perspectives and real-world experiences. Customer reviews on reputable e-commerce platforms can offer valuable insights into the experiences of previous buyers.
Professional Installation
Professional installation significantly impacts the final outcome and the lifespan of Conwood finishes. Skilled installers possess the expertise to ensure proper application techniques, minimizing imperfections and maximizing the product’s potential. They also understand the nuances of specific installation methods, guaranteeing a flawless result. Hiring a qualified installer mitigates potential problems and maximizes the finish’s overall aesthetic and functional benefits.
Surface Preparation
Thorough surface preparation is fundamental to achieving a flawless and long-lasting finish. Imperfections, such as uneven surfaces or loose debris, can lead to inconsistencies and premature wear in the finish. Ensuring a clean, smooth, and stable surface before applying the finish is paramount. This crucial step significantly impacts the finish’s quality, longevity, and overall appeal. This meticulous preparation is the cornerstone of a successful installation.
A properly prepared surface ensures a flawless, durable finish.
Troubleshooting Common Issues
Choosing the right Conwood finish for your space is crucial for longevity and aesthetic appeal. Understanding potential problems and their solutions is key to maintaining the beauty and functionality of your flooring. This section details common issues with Conwood G1 and G2 finishes, offering preventative measures and solutions to keep your investment looking its best.
Identifying and Resolving Staining Issues
Staining is a common concern with any flooring, and Conwood finishes are not immune. Different stains require different solutions. Knowing the source of the stain—whether it’s spills, dirt, or other substances—is the first step in determining the appropriate cleaning method. Using improper cleaning agents can damage the finish, worsening the problem. Prompt action is critical in minimizing damage.
- Water-Based Stains: Blot up excess water immediately with a clean cloth or paper towel. Avoid scrubbing, which can spread the stain or damage the finish. Apply a specialized wood cleaner or a mild soap solution, then rinse thoroughly and dry completely. For stubborn stains, consider a professional cleaning service.
- Food-Based Stains: Promptly blot up the spill with a clean cloth. Avoid harsh scrubbing. Apply a wood cleaner appropriate for the specific stain. Repeat as necessary and always dry thoroughly to prevent water damage.
- Chemical Stains: Identify the chemical immediately and consult with a professional cleaner or a Conwood representative for appropriate cleaning solutions. Never attempt to remove chemical stains without professional guidance, as incorrect methods can damage the finish and the underlying wood.
Addressing Scratches and Scouring
Scratches and scouring are inevitable with high-traffic areas. The severity of the issue depends on the type of finish and the nature of the impact. Preventive measures, such as using rugs or mats at high-traffic entrances, can minimize these issues. Careful cleaning methods are also crucial in preventing unnecessary wear and tear.
- Minor Scratches: For minor scratches, use a wood filler specifically designed for the Conwood finish. Match the color of the filler to the existing finish as closely as possible to avoid noticeable differences. Sand lightly after the filler has dried to blend seamlessly.
- Deep Scratches: Deep scratches might require professional repair. A qualified wood repair specialist can assess the damage and determine the best course of action, which may include refinishing or replacing damaged areas.
- Scouring: Prevention is key to avoiding scouring. Use appropriate cleaning solutions and avoid abrasive scrubbing. Rugs and mats can significantly reduce scouring by providing a protective barrier. Regular cleaning and maintenance can also help prevent buildup that contributes to scouring.
Maintaining the Finish
Proper maintenance is crucial in preserving the integrity of Conwood finishes. Consistent care prevents damage and ensures longevity. Following the manufacturer’s recommendations for cleaning and care is paramount to avoiding costly repairs.
| Potential Problem | Solution |
|---|---|
| Stains (e.g., water, food, chemicals) | Blot up immediately, use appropriate cleaner, avoid harsh scrubbing, seek professional help if needed. |
| Scratches (minor) | Use wood filler, match color, sand lightly. |
| Scratches (deep) | Professional repair, refinishing, or replacement. |
| Scouring | Use appropriate cleaning agents, avoid abrasive scrubbing, use rugs or mats, maintain regular cleaning schedule. |
| Excessive moisture | Proper ventilation, prompt drying of spills, and avoiding prolonged exposure to water. |
Concluding Remarks
In conclusion, selecting the right Conwood finish is a multifaceted process that requires careful consideration of various factors. This guide has explored the key elements to help you make an informed decision, from understanding the distinct characteristics of G1 and G2 finishes to considering room-specific needs and maintenance requirements. By thoroughly evaluating the material composition, durability, and aesthetic appeal of each finish, along with the specific demands of each room, you can confidently choose the ideal Conwood finish that meets your unique needs and enhances the beauty and functionality of your space.
Ultimately, remember that proper maintenance and care are essential for maximizing the longevity and value of your investment.