Best 3D Visualization Software for Conwood G1 & G2
Best 3D visualization software for Conwood G1 and G2 interior projects unlocks a world of design possibilities. From crafting stunning visuals to streamlining client communication, the right software is crucial for successful projects. This comprehensive guide explores the essential tools and techniques to elevate your Conwood interior designs, ensuring a smooth workflow and impressive final presentations.
This exploration delves into the specifics of Conwood G1 and G2 projects, highlighting their unique characteristics and the software capabilities needed to accurately represent them. We’ll cover the essential features, compare top options, and provide practical tips for effective visualization, ultimately empowering you to create compelling visuals that sell your designs.


Introduction to 3D Visualization Software
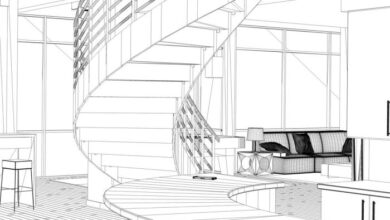
- D visualization software has become an indispensable tool for interior designers, architects, and construction professionals. It allows for the creation of realistic and interactive 3D models of interior spaces, significantly enhancing the design process and communication with clients. This detailed overview explores the key features, types, and applications of such software.
- D visualization software goes beyond traditional 2D blueprints and sketches, providing a dynamic and immersive experience. This technology empowers designers to showcase their concepts in a compelling way, fostering better understanding and client approval. Crucially, it enables early detection of design flaws, potentially saving time and resources in the long run.
Key Features and Functionalities
D visualization software typically includes a suite of features for modeling, texturing, lighting, and rendering. Modeling tools allow for the creation of accurate 3D representations of furniture, fixtures, and architectural elements. Texturing tools add realistic materials and finishes to the models, creating a more visually appealing and accurate representation. Lighting tools enable designers to simulate natural and artificial light, impacting the overall atmosphere of the space.
Finally, rendering capabilities produce photorealistic images and animations of the interior design.
Types of 3D Visualization Software
Several types of 3D visualization software are available, each with its own strengths and weaknesses. Some are geared towards beginners, offering intuitive interfaces and simplified workflows, while others are more complex, catering to advanced users and professional needs. Software solutions often come with various pricing models, affecting their accessibility to different professionals and budgets.
Examples of Successful 3D Visualization Projects
Numerous successful interior design projects have leveraged 3D visualization to achieve impressive results. These projects often feature intricate details, realistic rendering, and stunning visualizations of the final product. They showcase the potential of 3D visualization in creating compelling and persuasive presentations for clients.
Comparison of 3D Visualization Software
| Software | Rendering Speed | Ease of Use | Price Point |
|---|---|---|---|
| Software A | Fast | Intermediate | High |
| Software B | Medium | Easy | Moderate |
| Software C | Slow | Difficult | Low |
This table provides a general comparison of different visualization software, highlighting variations in rendering speed, ease of use, and pricing. Factors like the specific features required and the user’s technical expertise should be considered when making a choice.
Conwood G1 and G2 Interior Projects
Conwood G1 and G2 interior projects present unique design and construction characteristics that demand specialized visualization software. Understanding these specifics allows for accurate and compelling renderings, crucial for client presentations and project approvals. These projects often involve intricate layouts, custom finishes, and the need to showcase the unique material properties of the Conwood products. This necessitates software capable of handling complex geometry and achieving high-quality visualizations.
Unique Design and Construction Characteristics
Conwood G1 and G2 structures often feature intricate, custom-designed layouts with varying levels and complex architectural elements. The use of sustainable, natural materials like wood is a defining characteristic, which requires accurate representation in the visualizations. The construction methodology often involves unique structural elements, demanding precise modelling and rendering capabilities within the chosen visualization software.
Potential Challenges and Considerations
Visualizing Conwood G1 and G2 spaces presents challenges related to accurate representation of the unique materials and their specific textures. The interplay of natural light, shadows, and reflections on the wood finishes requires advanced rendering capabilities. Software must also handle the often complex geometries and spatial configurations common to these projects.
Accurate Representation of Conwood Materials
The visualization software needs to accurately portray the inherent beauty and natural variation of Conwood materials. Rendering must convey the warmth, texture, and grain patterns specific to each Conwood product. This includes nuanced representations of wood finishes, such as stains, paints, and lacquers, crucial for conveying the specific aesthetic desired.
Importance of Realistic Material Rendering
Realistic material rendering is paramount for Conwood G1 and G2 projects. Clients need to visualize the space as it will appear in reality. Inaccurate rendering can lead to misunderstandings or disappointment upon completion. High-fidelity rendering capabilities are critical to avoid these issues.
Comparison with Other Interior Projects
While other interior projects may feature diverse materials, the emphasis on showcasing the natural beauty and unique characteristics of Conwood distinguishes these projects. Software for general interior projects may struggle to capture the nuances of Conwood finishes. The intricate structural aspects of Conwood constructions also require specialized handling compared to standard interior projects.
Specific Features Required for Conwood Materials
| Feature | Description |
|---|---|
| Wood Grain Simulation | The software should accurately simulate the natural grain patterns of different Conwood products. |
| Material Properties | Rendering should account for the specific reflectivity, transparency, and texture of the Conwood materials. |
| Customizable Finishes | The software should allow for precise representation of various stains, paints, and lacquers applied to the Conwood surfaces. |
| Realistic Lighting Simulation | The software should accurately depict the effect of natural and artificial lighting on the wood’s surface. |
| Scalable Modeling | The software should handle complex geometries and intricate details of the Conwood structure, allowing for large-scale visualizations. |
Top 3D Visualization Software Options
Choosing the right 3D visualization software is crucial for effectively showcasing Conwood G1 and G2 interior projects. The software selected should accurately represent the intricate details and complex geometries of these designs, enabling potential clients to visualize the spaces with clarity and precision. The ability to render materials and textures realistically is also paramount for conveying the desired aesthetic and atmosphere.
Software Options for Conwood Projects
Selecting the appropriate software depends heavily on the specific needs of the project. Factors such as budget, required features, and the complexity of the designs influence the choice. Several leading 3D visualization software options cater to interior design, offering varying levels of functionality and features.
Top 3D Visualization Software
- Autodesk 3ds Max: A powerful and widely used software for creating 3D models and visualizations. Its robust tools excel at handling complex geometric forms, particularly beneficial for the intricate designs often found in Conwood projects. Material libraries and rendering capabilities are extensive, allowing for highly realistic visualizations. However, it’s a more expensive option compared to others on this list, and a steeper learning curve for beginners.
- Blender: A free and open-source software option. Blender possesses impressive capabilities for complex modeling, animation, and rendering. While its extensive features can be overwhelming for beginners, it offers significant value for money. Its learning curve can be substantial, but the resulting visualizations can be comparable to those generated by commercial software.
- SketchUp: Known for its intuitive interface and user-friendly tools, SketchUp is ideal for users who prefer a simpler workflow. Its ability to handle architectural models and interior design elements makes it suitable for Conwood projects. While its rendering capabilities are not as sophisticated as 3ds Max, it’s excellent for quickly creating visualizations and models.
- Lumion: A dedicated visualization software that focuses on creating photorealistic renderings. Lumion excels at seamlessly integrating various elements and is relatively user-friendly, making it a strong choice for users prioritizing quick turnaround times. Its ability to handle complex environments with ease makes it suitable for Conwood projects. Its user interface and tools are intuitive, making it less challenging for beginners compared to 3ds Max.
Comparative Analysis
| Software | Strengths | Weaknesses | Price Range | Handling Complex Forms |
|---|---|---|---|---|
| Autodesk 3ds Max | High-quality rendering, extensive features, complex modeling capabilities | Steep learning curve, expensive | High | Excellent, capable of intricate shapes and geometries |
| Blender | Free, powerful tools for complex modeling and animation | Steeper learning curve, limited pre-built libraries, fewer pre-made options for materials and lighting | Free | Good, capable of detailed modeling, though requiring more user expertise |
| SketchUp | Intuitive interface, fast workflow, suitable for architectural projects | Limited rendering capabilities, less complex modeling options compared to 3ds Max | Mid-range | Good, but less suitable for highly complex geometries |
| Lumion | Easy-to-use interface, photorealistic rendering, fast rendering times | Limited modeling capabilities, requires a lot of assets and materials to be imported | Mid-range | Good, ideal for quickly visualizing the overall project, but complex forms may require more work |
Software Features for Conwood Visualization
Choosing the right 3D visualization software is crucial for showcasing the unique aesthetic and functionality of Conwood G1 and G2 interiors. Effective software allows for the precise representation of textures, finishes, and lighting, ultimately influencing design decisions and client satisfaction. A powerful visualization tool should enable designers to seamlessly integrate furniture and fixtures, creating realistic and compelling renderings.
Capturing Conwood’s Unique Textures and Finishes
High-quality 3D visualization software must accurately reproduce the varied textures and finishes of Conwood products. This includes detailed representations of wood grains, surface patterns, and any special coatings. Software with advanced material libraries, allowing for the precise specification of wood types, color variations, and finishes, is essential. The software should offer customizable options to represent the specific characteristics of each Conwood product, from subtle variations in wood tone to unique surface treatments.
Creating Photorealistic Renderings of Conwood Interiors
Photorealistic rendering capabilities are vital for convincing presentations. The software should allow for the creation of images that closely mimic real-world environments. Advanced rendering engines, capable of accurately simulating light interactions with materials, are critical for achieving this level of realism. This ensures the Conwood interiors are presented in a way that is both visually appealing and representative of the final product.
Simulating Lighting Conditions and Their Impact, Best 3D visualization software for Conwood G1 and G2 interior projects
The impact of lighting on Conwood’s unique materials is significant. The software should allow for the simulation of different lighting scenarios, including natural light, ambient light, and various artificial light sources. Adjusting the intensity, color temperature, and direction of light will showcase the depth and richness of Conwood’s finishes. The software should offer controls for accurate light reflections and shadows to ensure realistic and compelling results.
Integrating Furniture and Fixtures
The software should seamlessly integrate furniture and fixtures into the visualizations. This includes a vast library of pre-designed models or the ability to import custom models. This allows for a comprehensive view of the space, incorporating furniture arrangements and showcasing the potential of Conwood in different design styles. This capability allows designers to visualize the entire interior, from the walls to the furniture and fixtures, in a cohesive and realistic manner.
Visualization Options for Displaying Conwood’s Unique Qualities
The table below highlights key visualization options for showcasing the unique qualities of Conwood. Careful consideration of these factors will allow designers to create compelling renderings.
| Visualization Option | Description | Impact on Conwood |
|---|---|---|
| Lighting | Adjusting light intensity, color, and direction | Highlights the natural wood tones, accentuates textures, and reveals depth in the materials. |
| Materials | Precise selection of wood types, finishes, and colors | Accurately represents the unique qualities of Conwood, showcasing its variations in grain and color. |
| Camera Angles | Experimenting with different perspectives | Provides multiple viewpoints of the space, showcasing the overall design and highlighting specific details of Conwood. |
Case Studies and Real-World Applications
Bringing Conwood G1 and G2 interior spaces to life requires powerful visualization tools. Successful projects go beyond simply rendering images; they effectively communicate the design’s intent and potential to clients, driving informed decisions. This section details real-world applications, showcasing how 3D visualization software helps Conwood achieve client approvals and project success.The ability of 3D visualization software to transform design concepts into immersive experiences is crucial for client engagement.
Choosing the right 3D visualization software for Conwood G1 and G2 interior projects is crucial. Considering family-friendly options like resorts, such as Stella Island Luxury Resort & Spa reviews for families , can provide valuable insights for design inspiration. Ultimately, the best software will depend on specific project needs and budget, ensuring a smooth and effective design process for Conwood G1 and G2 interiors.
Visual representations, including walkthroughs and animations, play a pivotal role in the approval process, allowing clients to interact with the spaces before construction begins. Effective communication through visualization can reduce misunderstandings and lead to more satisfying final products.
Successful Visualization Projects for Conwood G1 and G2 Interiors
Conwood’s use of advanced 3D visualization software has yielded numerous successful interior design projects. These projects demonstrate the software’s capabilities in conveying design intent, material choices, and overall ambiance of the Conwood G1 and G2 spaces. Key elements of successful visualizations include accurate material representations and realistic lighting scenarios.
- Project 1: Modern Minimalist G1 Suite: A project showcasing a modern minimalist design for a Conwood G1 suite utilized photorealistic renderings and detailed material visualizations to precisely depict the chosen finishes, including polished concrete floors and sleek cabinetry. This visualization technique helped the client envision the space’s contemporary feel and made the design intent clear. Client feedback was positive, confirming the visualization effectively communicated the desired aesthetic.
- Project 2: Warm and Inviting G2 Loft: This project used a combination of walkthroughs and animations to demonstrate the flow and functionality of a warm and inviting G2 loft. Sophisticated lighting simulations highlighted the architectural features and showcased the cozy atmosphere intended. The animated walkthroughs allowed the client to experience the space’s ambiance from various perspectives. The results included unanimous approval and feedback, affirming the visualization’s effectiveness.
- Project 3: Luxurious G1 Master Suite: A luxurious G1 master suite project used high-quality textures and lighting simulations to accurately portray the high-end materials, like marble and hardwood. Detailed renderings of the master bath and bedroom, including furniture placement, helped the client visualize the opulent design. The presentation package, encompassing both static images and interactive walkthroughs, contributed significantly to securing client approval.
Communicating Design Intent and Material Characteristics
Effective visualization software accurately represents the intended design, material choices, and overall aesthetic. The use of photorealistic rendering and precise material libraries is critical in achieving this goal.
- Material Accuracy: Precise material libraries allow designers to accurately depict textures, finishes, and colors of materials. Accurate representation fosters trust in the design, ensuring that the final product reflects the client’s vision.
- Realistic Lighting: Accurate lighting simulations create a realistic ambiance and showcase the design’s aesthetic. Proper lighting helps convey the desired mood and atmosphere of the interior space.
- Detailed Renderings: Detailed renderings enhance the visual appeal and clarity of the visualizations. They provide a comprehensive view of the design, allowing clients to understand the design’s finer points.
Client Approvals and Feedback Through Visualization
Visualization software plays a crucial role in obtaining client approvals and incorporating feedback. Interactive features like walkthroughs and animations allow clients to engage with the design and provide feedback in a natural and intuitive way.
- Interactive Walkthroughs: Interactive walkthroughs enable clients to experience the space virtually, providing a more immersive and engaging experience than static images.
- Client Feedback Mechanisms: Software often includes tools to collect client feedback during the visualization process, facilitating quick and effective communication.
- Revisions and Iterations: Visualizations allow for rapid revisions and iterations based on client feedback, leading to a collaborative design process.
Creating Walkthroughs and Animations for Conwood Projects
The process of creating walkthroughs and animations involves careful planning, using the software’s tools and features. Realistic animation is key to showing space flow and functionality.
- Defining the Sequence: Planning the sequence of views and actions within the walkthrough or animation is crucial.
- Animating Objects: Software enables the animation of objects, furniture, and light fixtures, enhancing the realism and engagement of the presentation.
- Controlling the Camera: The camera’s movement within the animation significantly impacts the client’s experience. Software tools enable the creation of dynamic camera angles and perspectives.
Comprehensive Presentation Package Creation
Creating a compelling presentation package involves compiling all the visualization outputs. A well-structured package is essential for effectively communicating the design intent.
- Organizing Files: Organizing the visualization files in a logical and accessible manner is vital.
- Including Supporting Documents: The presentation package should include supporting documents, such as material specifications and design rationale.
- Presentation Software: Using appropriate presentation software to showcase the package is crucial for an effective delivery.
Tips and Tricks for Effective Visualization: Best 3D Visualization Software For Conwood G1 And G2 Interior Projects
Creating compelling 3D visualizations for Conwood G1 and G2 interior projects requires a blend of technical proficiency and artistic sensibility. Effective visualization not only showcases the space but also communicates the design intent to clients, facilitating better understanding and approval. These tips and tricks delve into optimizing rendering times, achieving realism, and managing complex projects.Understanding the nuances of rendering software and employing strategic techniques can drastically reduce rendering times while preserving high quality visuals.
Utilizing appropriate lighting, materials, and scene complexity settings is key to optimizing output. A crucial aspect of successful visualization is presenting the output in a way that resonates with clients, translating the digital representation into tangible value.
Optimizing Rendering Times
Effective rendering is crucial for efficient project workflow. Reducing rendering times allows for quicker iterations and client feedback loops, accelerating the design process. Proper scene setup is paramount. Excessive detail, complex materials, and high resolution textures can significantly increase rendering times. Employing the software’s rendering options for optimizing image quality is essential.
These settings may include adaptive sampling or different anti-aliasing techniques. Strategies for minimizing scene complexity include grouping objects, utilizing appropriate light settings and choosing the right camera angle.
Achieving Realistic Results
Realistic visualizations enhance the client’s ability to envision the final product. Precise material selection and realistic lighting play a pivotal role. Using realistic textures and material libraries, tailored to the Conwood G1 and G2 project’s specific materials, is essential. Lighting must accurately reflect the intended ambiance. Strategic use of ambient light, directional lights, and spot lights can greatly improve the realism of the visualization.
Employing a realistic camera angle with accurate perspective is also crucial.
Creating Appealing and Informative Visualizations
Visually appealing and informative visualizations are crucial for effective communication. Understanding the client’s needs and expectations is critical. A clear understanding of the intended audience—whether it’s a homeowner, investor, or architect—guides the visualization’s style and content. Choosing an appropriate color palette and composition enhances visual appeal. Clear and concise labeling of key features can greatly enhance the project’s clarity.
High-quality renderings should incorporate accurate representation of furniture placement, architectural details, and material finishes.
Managing Complex Projects
Managing complex projects effectively requires a well-structured workflow. A project management system, integrated with the visualization software, can be extremely beneficial. Utilizing version control for design files ensures efficient collaboration. Maintaining a detailed project timeline, including milestones and deadlines, allows for better progress tracking and efficient resource allocation. Establishing clear communication channels with clients and team members is critical to a smooth workflow.
Presenting Visualization Outputs
Presenting visualizations effectively to clients is crucial for conveying design intent. Utilizing high-resolution images and videos allows for a detailed presentation. Presenting visualizations in a slideshow or interactive 3D model can effectively demonstrate the design features. Adding captions and labels to highlight key elements within the visualization can enhance understanding. Demonstrating how the visualization relates to the project’s overall goals is vital.
This might include showing how the space functions or aligns with the client’s vision.
Step-by-Step Guide for High-Quality Visualization
This step-by-step guide Artikels the process for creating a high-quality visualization:
- Define the Scope: Clearly Artikel the project’s goals, target audience, and desired aesthetic. Visualizing a modern, minimalist living room will require different techniques than visualizing a rustic, farmhouse-style kitchen.
- Scene Setup: Accurately model the space, including walls, floors, and ceilings. Import or create accurate 3D models of furniture and other objects. Organize objects in a logical manner. Ensure that the project is set up in the correct scale and units.
- Lighting and Materials: Set up appropriate lighting to create the desired ambiance. Select realistic and accurate materials for all elements. Employ realistic textures and colors that align with the project’s style. Use ambient occlusion and shadows to create a sense of depth and realism.
- Camera Angle and Composition: Strategically position the camera to showcase the space’s key features. Experiment with different angles and perspectives to capture the best view. Pay attention to the overall composition, including the balance of elements and negative space.
- Rendering and Post-processing: Render the scene using the chosen software’s settings. Optimize rendering parameters to achieve the desired quality and speed. Apply post-processing techniques such as color correction and image adjustments to enhance the visual appeal of the output. This could involve image sharpening, contrast adjustments, and color grading to enhance the visual appeal.
- Client Presentation: Prepare a professional presentation that effectively communicates the visualization’s key features. Include detailed descriptions of the project, highlighting its unique design elements and functionalities.
Outcome Summary

In conclusion, mastering the art of 3D visualization for Conwood G1 and G2 projects is paramount to achieving exceptional results. This guide has equipped you with the knowledge to choose the right software, leverage its features, and communicate your designs effectively to clients. From initial conceptualization to final presentation, the strategies discussed here will streamline your workflow and showcase your expertise.
By employing the insights gained, you can confidently present your designs, ultimately leading to successful Conwood interior projects.